Vinyl
Herringbone vinyl flooring: the parquet look for a fraction of the price
1 September 2026
Herringbone is one of the most recognisable signatures of classic parquet, and it is coming back into fashion through herringbone vinyl flooring. It is a way to have the presence of oak without the price of parquet, without the fear of water and without the upkeep that natural wood demands.
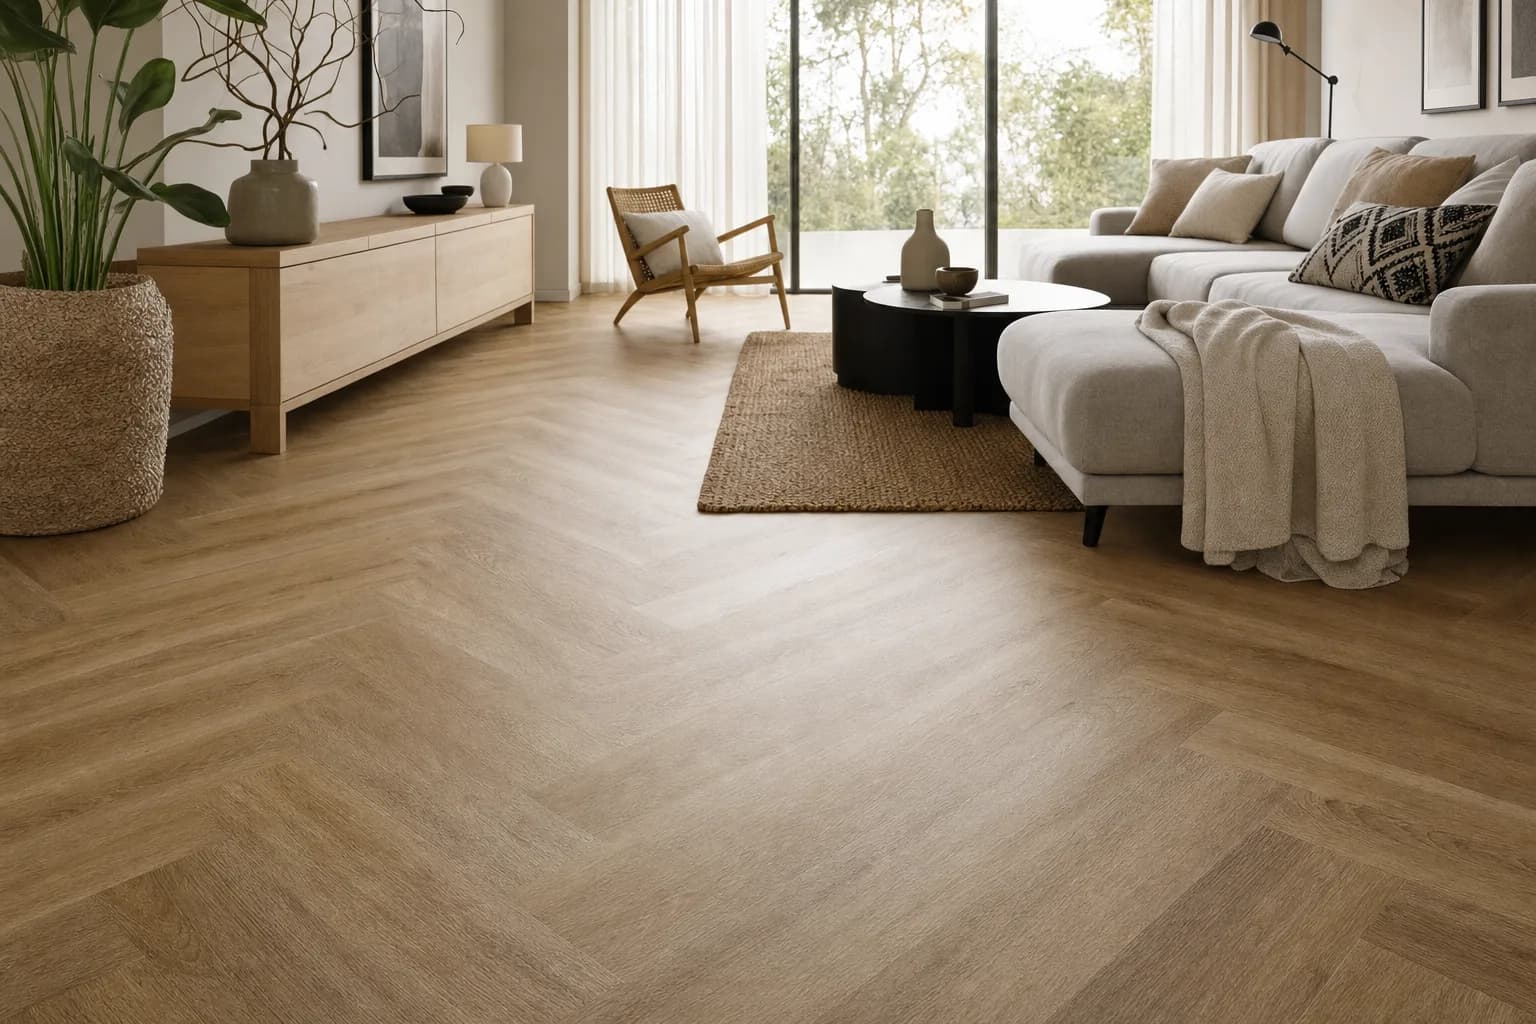
Herringbone belongs to old-town apartments, villas and restaurants — the pattern alone tells you that a room has been thought about. For a long time that look meant expensive solid or engineered oak parquet and a fitter who knew exactly what they were doing. Today herringbone vinyl flooring delivers an almost identical effect for a fraction of the cost, and adds water resistance and next to no maintenance on top. This guide explains how herringbone differs from chevron, how vinyl compares with real parquet, and how to choose well.
Why herringbone is back in fashion
The pattern goes back to the roads of the Roman Empire, and it first appeared in timber floors in the palaces of sixteenth-century France. The name comes from the skeleton of a herring, which is exactly what the zigzag of angled boards looks like from above. Over the past few years herringbone has been through a genuine revival: it fills interiors magazines, Pinterest and Instagram, and turns up in Scandinavian schemes and period apartments across Europe.
The reason is simple. Herringbone gives a floor the movement and depth that a straight plank layout cannot. The diagonal draws the eye outwards and makes a room read wider, while the smaller boards create the sense of an interior that has been finished properly. Vinyl puts that effect within reach of a far wider audience: you no longer have to choose between the floor you want and the budget you have.
Herringbone or chevron: how the patterns differ
The two are constantly confused, although they look quite different. The distinction lies in the shape of the boards and the geometry of the joint.
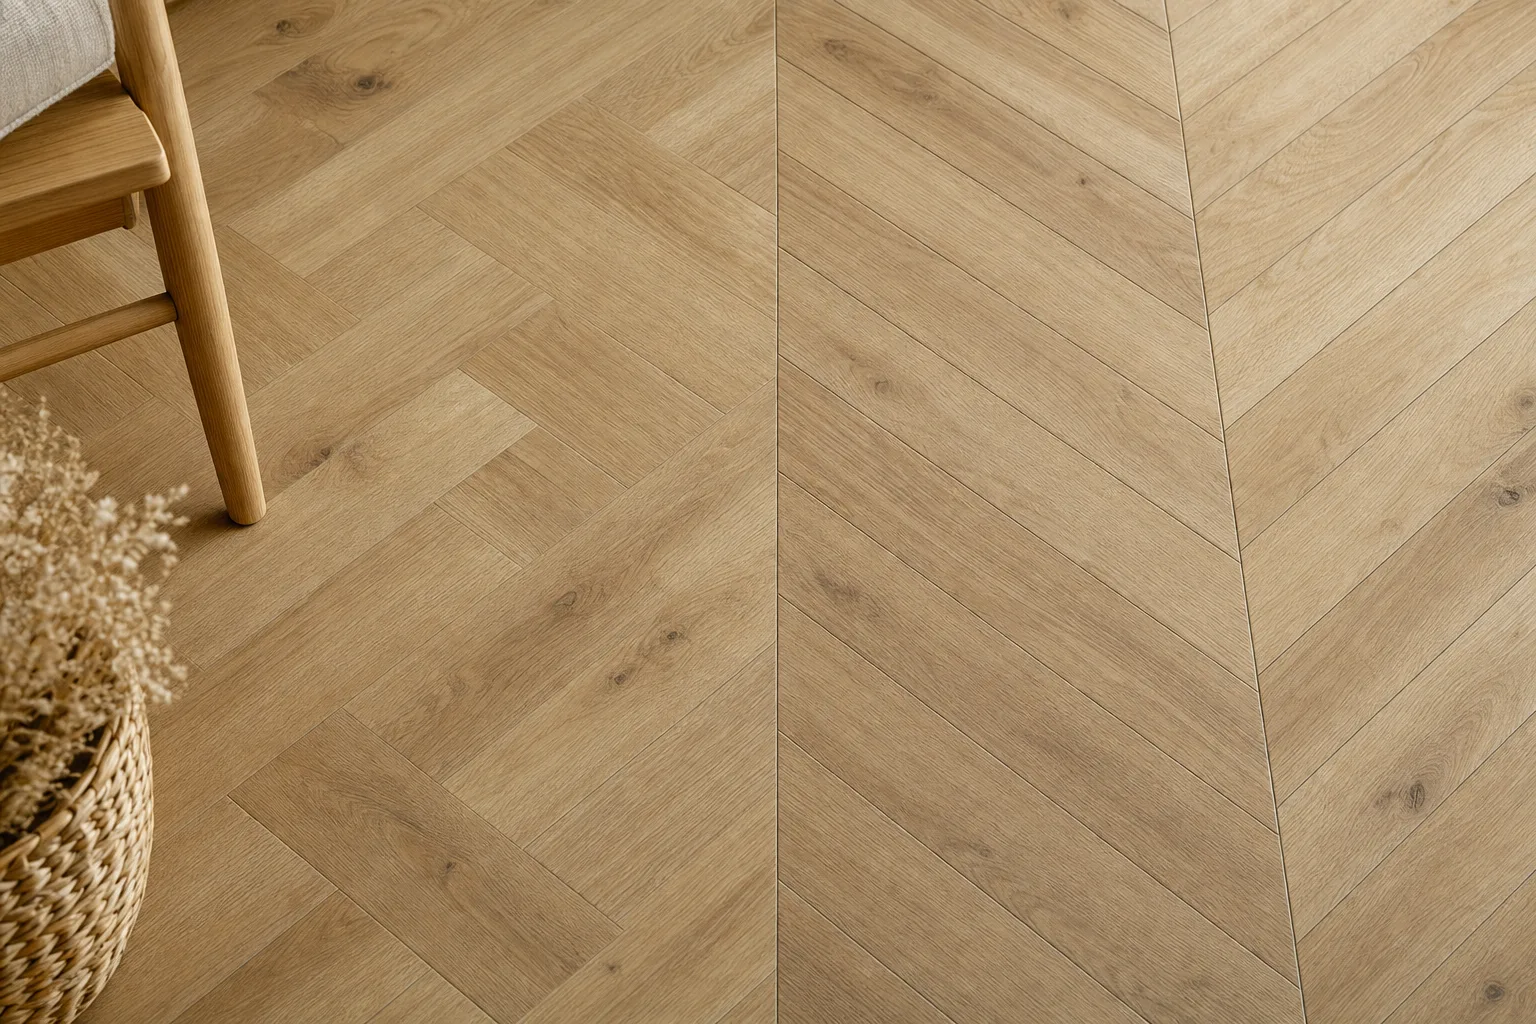
- Herringbone — rectangular boards with square-cut ends, set at a 90° angle to one another. The end of one board meets the side of the next, which produces a broken, slightly asymmetric zigzag. This is the classic, versatile option, and it sits as comfortably in a traditional interior as in a modern one.
- Chevron (French herringbone, point de Hongrie) — the board ends are mitred at 45° or 60°, so they meet in a perfect pointed “V” with a continuous straight seam running the whole length of the floor. The result is stricter and more graphic, like a row of arrows. Chevron suits modern, high-end interiors and lengthens a space even more strongly.
In real wood, chevron usually costs 10–30% more than herringbone: the mitred ends demand precise cutting, more material goes to waste and the fitter has to be more skilled. In vinyl the gap is narrower, because the pattern is already designed into the board. If you would like to go deeper, we have separate guides to herringbone parquet and chevron parquet.
Herringbone vinyl or real parquet: an honest comparison
This is the decision that matters most. Real herringbone parquet is authentic and extremely long-lived, but it is expensive and sensitive to moisture. Herringbone vinyl reproduces almost the same picture through embossed-in-register texture, where the surface relief follows the printed grain, and it brings practical qualities that wood simply cannot offer. Here is how the two compare on the points that count.
| Criterion | Herringbone vinyl (SPC / LVT) | Real oak herringbone parquet |
|---|---|---|
| Indicative price | ~25–45 €/m² (varies by country) | ~80–200 €/m² plus fitting |
| Water resistance | 100% waterproof (kitchen, hallway) | Sensitive to moisture, not for bathrooms |
| Scratch resistance | High (PU coating, usage class 32–42) | Moderate, depends on the lacquer or oil |
| Warmth underfoot | Warm, especially with an acoustic underlay | Very warm, a natural material |
| Maintenance | Vacuum plus a damp mop | Periodic oiling or re-lacquering |
| Underfloor heating | Suitable (surface up to ~27–28 °C) | Suitable, but more sensitive to temperature swings |
| Refinishing | Cannot be sanded (replaced instead) | Can be sanded several times |
| Installation | Click system, DIY possible | Glue-down, needs a professional |
In short: if longevity is what matters and you want a floor that will not need touching for decades, real parquet earns its price. For most households — particularly with children, pets or an open-plan kitchen — herringbone vinyl is the more practical and far cheaper answer. We look at that dilemma in more detail in our guide to engineered oak parquet or vinyl, and there is a general introduction to vinyl flooring as well.
Which rooms suit herringbone vinyl
The main advantage of herringbone vinyl is that you can lay it where real parquet would not survive. Water resistance and hard wear open up the whole house.
- Living and dining room — the pattern gives open-plan spaces a considered, expensive feel.
- Kitchen — warm underfoot, unlike tiles, and untroubled by splashes of water or grease.
- Hallway and corridor — it takes heavy traffic, grit and wet shoes without complaint.
- Bedroom — with an acoustic underlay, footsteps are noticeably quieter.
- Bathroom and WC — use glue-down (full-bond) vinyl, and keep click vinyl out of the direct shower splash zone.
Room size matters too: light tones (white-oiled oak, sand shades) make a space feel airy and larger, which is ideal for small rooms, while darker ones (walnut, smoked oak) look their best in generous spaces. Direction counts as well — run the herringbone along the longest wall and the room reads more spacious.
Fitting and preparation: what you need to know
Herringbone is more demanding than a straight layout, so the preparation decides the result. The essentials:
- A flat subfloor. Any deviation greater than about 2 mm over a metre has to be levelled out. The subfloor must be dry, clean and sound.
- Moisture control. Residual moisture in a concrete subfloor should not exceed 2%, and 0,5% in anhydrite; over concrete, use a vapour barrier.
- Acclimatisation. Leave the packs in the room for at least 24–48 hours before fitting so the material settles to the room temperature.
- Left and right boards. Herringbone packs contain boards marked “L” and “R”, and they have to be laid alternately.
- Start from the centre. Set out from crossed axes in the middle of the room rather than from a wall, so that the pattern stays symmetrical.
- Expansion gap. Leave roughly 8–10 mm around the perimeter for movement; large rooms may also need intermediate expansion joints.
- Waste allowance. Allow 10–15% extra material for herringbone (5–8% is enough for a straight layout). Our quantity calculator will work out the exact figure.
A confident DIY fitter can lay click herringbone, but for a first attempt the pattern is worth handing to a professional — a mistake at the start travels across the entire room. Fitting rates vary widely from one country to another, so treat any figure you read as indicative and ask a local fitter for a quotation before you set your budget.
How to choose: SPC or glue-down, wear class, shade
When you compare herringbone vinyl, a handful of specifications do most of the work.
- Construction. Click SPC has a rigid mineral core, shrugs off temperature swings and is laid floating. Glue-down LVT is thinner (about 2–2,5 mm), transfers the heat of an underfloor system best and suits damp areas.
- Wear layer. For a home, 0,3–0,55 mm is enough; the thicker it is, the better the floor resists scratching. Usage class 32 covers domestic use, 42 is built for heavy commercial traffic.
- Bevel and embossing. A four-sided micro-bevel together with embossed-in-register texture gives the most convincing parquet impression.
- Shade. Match it to the amount of light in the room and to your furniture — light oak is the safe all-rounder, a dark shade brings drama.
Our herringbone vinyl flooring collection covers both the classic herringbone and chevron. Among the most popular are the SPC Vigo and SPC Valencia Fish herringbone ranges. Before you order, request free flooring samples — a shade is always worth seeing in your own light.
Read next
- Vinyl flooring: the complete buyer's guide
- Engineered oak parquet or vinyl: which should you choose?
- Herringbone and chevron parquet explained
- Herringbone engineered oak parquet collection
- Herringbone vinyl flooring collection
Frequently asked questions
Is herringbone vinyl flooring waterproof?
Yes. SPC and other rigid-core vinyl floors are 100% waterproof, which is why they suit a kitchen, a hallway and even a bathroom (in wet areas we recommend the glue-down version). It is one of their most important advantages over real wood parquet.
What is the difference between herringbone and chevron?
Herringbone boards are rectangular and are laid at a 90° angle to one another, producing a broken zigzag. Chevron boards (French herringbone) have mitred ends, so they meet in a perfect “V” with a continuous straight seam. Chevron looks sharper and more contemporary.
How much does herringbone vinyl flooring cost?
Indicative prices across the European market start at around 25 €/m², with premium collections reaching 40–45 €/m² — several times less than real oak herringbone parquet. Levels differ from country to country, so check the current figures in our vinyl catalogue and ask for an exact quotation through our contact page.
Can herringbone vinyl be laid over underfloor heating?
Yes. Most SPC and glue-down vinyl floors are compatible with water-based underfloor heating as long as the surface temperature stays below roughly 27–28 °C. Glue-down vinyl transfers the heat even more efficiently, because there is no additional insulating layer beneath it.
Does herringbone work in small rooms?
Yes. A light-toned herringbone visually widens and lifts a space, so it works well in smaller rooms. It is worth running the pattern along the longest wall — the room then reads more spacious.
Can I fit herringbone vinyl myself?
A confident DIY fitter can lay click herringbone, but the pattern is more demanding than a straight layout: you set out from the centre of the room, alternate the “L” and “R” boards and allow 10–15% extra material. For a first attempt we recommend professional fitting so that the pattern stays true.